Configuring the Planon application (Cloud)
After restoring the Planon database, continue from step 3 (Cloud) / step 4 (on-premise) to activate the Data lake. |
Procedure
1. (* optionally) Add the Data lake TSI to your navigation panel and log out/log in.
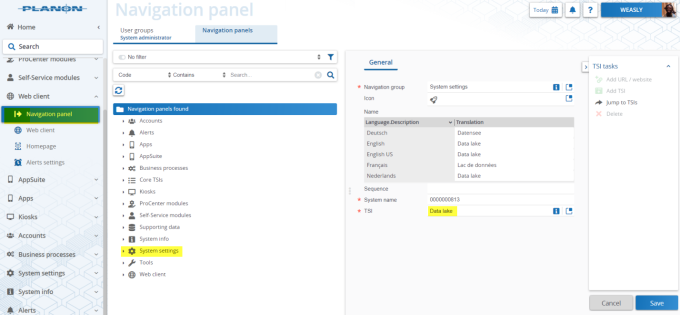
* If you are using Accelerator, this step is not required. |
2. Give users access to the Analytics Connector.
a. Go to > .
b. Select the user group of the users you want to give access
c. In the action panel, click Product definitions.
d. Link them to the Analytics product definition.
e. Click Save to apply your changes.
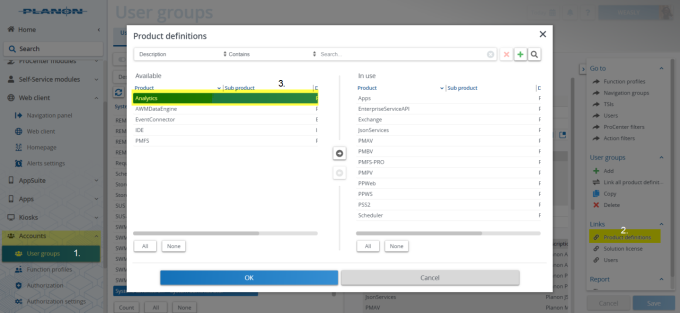
Users in the user group now have access to the Connector.
3. Go to the Data lake TSI
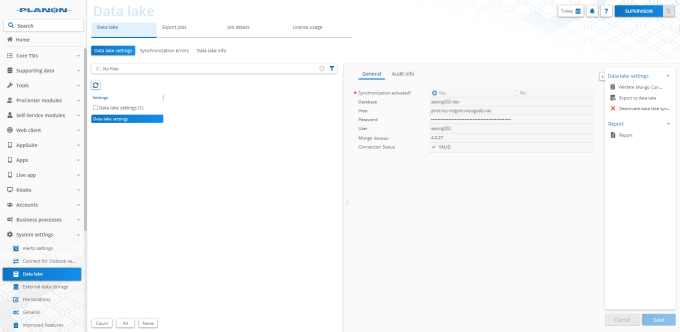
4. Optional, check the connection between the Planon application and the Data lake
To check if the connection between `the Planon application and the Data lake is working click on Validate Mongo connection.
If the connection is working, the version of MongoDB will be shown and the connection status will show Valid and a green check mark will be displayed.
If the credentials are invalid the version of MongoDB still will be shown but the connection status will be Invalid, wrong credentials and a yellow check mark will be displayed.
If no connection can be established, no information about MongoDB can be retrieved and the connection status will be invalid and a red check mark will be displayed.
If the connection is checked when the Data lake is operational and the check fails, the synchronization will automatically be stopped. Once the connection is restored the synchronization will commence again.
When encountering an invalid connection, please contact Planon Support to investigate and restore the cause of the connection failure. |
5. Click Export to data lake
The export is started as a background action.
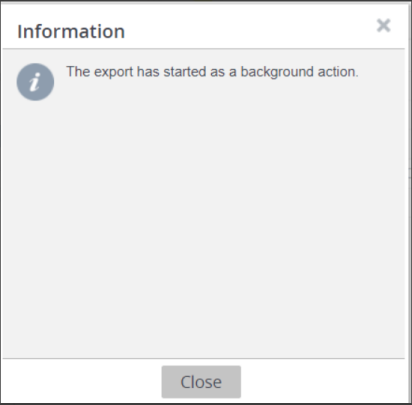
The initial export will now start by calculating the number of jobs needed to export the data to the data lake. When it is done calculating (about a minute), a dialog will appear saying that it is done creating background jobs to upload the data of Planon into the data lake.
During this time, any changes made to your Planon data will create synchronization "error" jobs. They can be resynchronized after the export to data lake is finished. |
The system will synchronize these automatically, but just avoid this if you can.
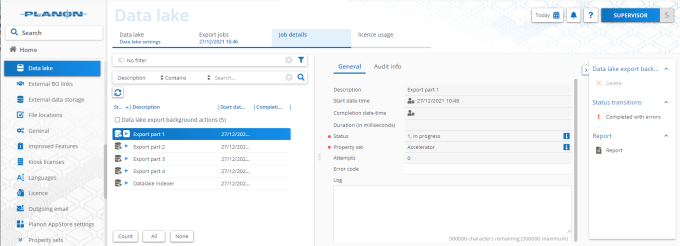
You can follow the progress of the background jobs in the Job details step of the Data lake TSI. When this is done, all data between Planon and the data lake will be kept in sync so updates in Planon will be reflected in the data lake with only a short time delay.
When done you can start using the connector.